E3 | Houseplant Soil, Spot Point Brick | Ask This Old House
Season 24 Episode 3 | 23m 42sVideo has Closed Captions
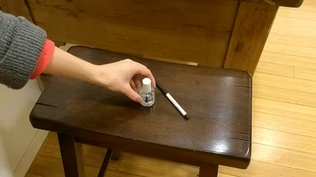
Remove ring stains from a wood table; soil for houseplants; spot pointing a brick floor.
Tom Silva shares a few methods to remove ring stains from a wood table using vinegar, baking soda, and a clothing iron; Jenn Nawada breaks down the types of soil and fertilizer needed for common indoor plants; Mark McCullough repairs a brick floor's crumbling mortar using spot pointing rather than a full repoint job. Demonstrating how a homeowner can save time and money with the technique.
Problems playing video? | Closed Captioning Feedback
Problems playing video? | Closed Captioning Feedback
Funding for Ask THIS OLD HOUSE is provided by The Home Depot and Renewal By Andersen.
Support provided by:

E3 | Houseplant Soil, Spot Point Brick | Ask This Old House
Season 24 Episode 3 | 23m 42sVideo has Closed Captions
Tom Silva shares a few methods to remove ring stains from a wood table using vinegar, baking soda, and a clothing iron; Jenn Nawada breaks down the types of soil and fertilizer needed for common indoor plants; Mark McCullough repairs a brick floor's crumbling mortar using spot pointing rather than a full repoint job. Demonstrating how a homeowner can save time and money with the technique.
Problems playing video? | Closed Captioning Feedback
How to Watch Ask This Old House
Ask This Old House is available to stream on pbs.org and the free PBS App, available on iPhone, Apple TV, Android TV, Android smartphones, Amazon Fire TV, Amazon Fire Tablet, Roku, Samsung Smart TV, and Vizio.
Keep Exploring


This Old House Insider Newsletter
Get This Old House exclusive stories, tips, and behind-the-scenes information delivered right to your inbox every month.Providing Support for PBS.org
Learn Moreabout PBS online sponsorship♪♪ Kevin: On "Ask This Old House," our experts travel across the country to answer questions about your house.
♪♪ Today, does your furniture have water stains?
Tommy gives a few tips on ways to remove them.
Tom: Look at that, huh?
Kevin: Then Jenn discusses the importance of soil selection when choosing houseplants.
And Mark helps a homeowner repoint their brick floor.
Joe: You can see water got in and eroded it.
Kevin: All that on "Ask This Old House."
♪♪ Kevin: Uh-oh, Tommy, I didn't do it.
Did you leave a wet glass on the table?
Tom: Somebody did it.
It was either a hot cup of coffee or a glass that was all sweating with water.
Kevin: Somebody does it a million times a day.
A big problem.
Tom: It's amazing.
Kevin: Please tell me you've got some, like, Tommy magic that's going to make these disappear before we get in trouble.
Tom: There's no magic way to make it totally disappear, unless you're going to refinish the top.
Kevin: Right.
Tom: In other words, it could get it completely gone, or it just make a big difference.
Kevin: Okay.
Tom: And this one here is first solution.
This is actually vinegar.
Kevin: Really?
Tom: Yeah.
And you take the vinegar and you actually put it right on the stain.
Kevin: Oh, it just made me wince.
Vinegar?
Tom: I'm going to-- Yeah.
Kevin: I think of vinegar as aggressive.
Like, I use it outside to kind of get mildew off my bulkhead, and I even kill weeds with it.
You're putting it on grandma's table?
Tom: Yeah.
I mean, it is very aggressive.
And you're right, it does work great on weeds and stuff like that.
The idea is to put it on the stain and then just let it sit there a little bit.
And you don't want it to sit there too long I guess.
Vinegar is great for removing minerals.
Kevin: So a water stain, it actually leaves some deposits of minerals behind?
Tom: Yeah, it'll go -- it'll go after the water stain that was left.
Kevin: Right.
Tom: I think it's removed.
Kevin: Looks like it faded a little bit.
I feel like it's better.
Tom: Yeah.
And then to blend the finish back in, take some olive oil -- put a little bit of olive oil on there.
Kevin: Wait a second.
So vinegar and olive oil is your solution.
You're making a salad here, Pops?
Tom: It's going to be like a salad, yeah.
Kevin: What's the deal with the olive oil?
Tom: Well, the olive oil is basically to replace the finish.
It should blend it in.
Kevin: Oh, like a -- like, literally, like, give it a gl-- Oh my gosh.
Tom: But that's a big difference.
Kevin: That's like 90% better.
Grandma's gonna be happy.
Tom: Yeah.
All right, so there's one.
I think it worked pretty good.
Kevin: Yeah.
Tom: All right.
All right, so a little bit more aggressive here.
Another circular stain.
Tom: We're definitely going to be a little more aggressive.
This is one part water and two parts baking soda.
We'll put it together and we'll mix it up.
Kevin: I've seen this trick used on, like, stone.
What is the idea here?
Um... You know, when I think of it on a stone, I think of it as sort of like, almost absorbing it.
What do you think is going on here?
Tom: Well, I think the baking soda is basically like a fine stone, so it can be a little aggressive.
And the water, I think is just getting into the stain itself, allowing everything to soak together.
Kevin: So a bit of an abrasive, bit of an absorbent.
Tom: Yeah.
And so we let that set for a couple of minutes.
Kevin: Okay.
I'll take that cup from you.
Tom: All right.
And another one that a lot of people use... Kevin: That's pretty aggressive right there.
Big, wide.
Tom: ...is we'll take a cotton rag, we'll set it on top of the stain, we'll take a hot iron.
Kevin: Ooh.
Tom: All right.
We want to make sure the iron is hot.
We don't want it to be too hot.
So we want to heat it up.
Kevin: Do you know what the original finish was?
I mean, obviously someone painted it or stained it.
Tom: This looks like a lacquer.
It feels like a lacquer.
Kevin: Lacquer on top of stain?
Lacquer on top.
Tom: Yeah, they probably stained it.
And then there's a -- there's a lacquer.
Lacquer is a pretty common finish.
We got to get it hot, but we don't want to overheat it because we don't want to melt the lacquer.
Kevin: These are tricks, I presume when you've got a film finish on top as opposed to, like, a bare wood.
Tom: Yeah.
I don't think this would work if you used a water-based finish.
Kevin: Right?
Tom: But your oil bases or your lacquer base would probably work pretty good.
Kevin: That's really working.
Tom: Slowly working.
So let it sit, and I'm going to take a clean rag, I'm going to rub this around.
See how this is working out.
Kevin: Can I iron while you do that?
Or do you think this has gone far enough?
Tom: Yeah.
I think you should iron it a little bit.
Just don't get it hot, hot.
I'll leave this paste there.
I can still see that the ring is here on this.
Kevin: The goal probably is not perfection.
But to make them disappear, that might be too much to ask without completely refinishing it.
Tom: Well, you'd like to remove as much as possible, but can you get it all away?
You're dealing with the finish that has been damaged a little bit from the water, or the hot coffee or tea or whatever it is, and then you're trying to replace it a little bit... Kevin: Right.
Tom: ...or blend it.
So this... Kevin: That has dramatically diminished actually.
Tom: Yeah.
Kevin: Check that out.
Mine's almost gone too.
Tom: Yeah, you notice we also dulled the finish a little bit right here.
Kevin: So what are you going to do about the dulled?
Tom: Well I'm going to put some furniture polish on mine.
See how that works.
Kevin: Can I tap mine with a little bit of olive oil?
Tom: Absolutely.
See what happens here.
Kevin: Oh my gosh.
Tom: Oh, that's a big difference over there.
Kevin: Grandma's never going to know.
Tom: Look at this.
Kevin: We are totally getting away with this.
Tom: Look at that, huh?
Kevin: Oh, look at yours!
Tom: Yep.
Kevin: Almost perfection.
Not quite, but almost perfection.
Tom: A lot better than it was.
Kevin: A lot better than it was.
Tom: Ooh.
♪♪ ♪♪ Kevin: Hey, Jenn.
Jenn: Hey, Kevin.
Kevin: I love it when you bring me inside.
Especially to places as beautiful as this.
Jenn: I know, we're here today because I get so many questions on how to take care of houseplants, right?
Kevin: Put me on the list.
Jenn: Well, number one, I think one of the most important things is soil.
The soil medium that each different houseplant is mixed in.
Kevin: So I shouldn't just take a shovel full of something outside and put it for my houseplants.
Jenn: No, they require -- They really want to mimic their natural environment where they are outside in this world.
So now bringing it to the indoors, we have three different categories.
We have epiphytes, aroids, cactus, and succulents.
Kevin: I've heard of those.
I have no idea what these are.
What's an epiphyte?
Jenn: So an epiphyte is a plant that lives on another plant.
It has a symbiotic relationship.
It's not a parasite.
So this is a common one.
It's an orchid.
See the roots.
Kevin: They're just hanging out there.
Jenn: Yeah.
So if you could picture it growing on a tree, they're going to wrap themselves around any kind of chunky material.
And so you want to recreate that indoors, and the soil medium that you would use for that -- they really appreciate a chunky mix, right.
Check that out.
That's sphagnum moss.
Kevin: Oh, yeah.
Bulky but very light.
Jenn: Yep.
This is called perlite.
Kevin: Oh, yeah, I'm used to seeing it smaller but same idea.
Jenn: Right, so these larger chunks just promote air circulation within the soil and great drainage.
And this is all from coconut husk, right.
Kevin: Mm-hmm.
Jenn: So these plants go in here and then they're going to love that environment.
When you water them it gets enough water, holds on to it, but it doesn't have standing water.
Kevin: So you want to make sure that these can drain whatever water you put on them.
Jenn: Exactly.
Kevin: All right.
Jenn: So here for fertilizer, we have -- it's a water soluble fertilizer.
But this one you apply just the drops directly onto the plant and just read the package according to the pot size.
Kevin: So you're not actually diluting this with regular water, you're just going to put it right to them.
Jenn: Correct, and then you'll be able to get your feeding schedule by the instructions they give you.
Kevin: Okay.
Uh, aroids?
Jenn: Aroids.
Kevin: What's an aroid?
Jenn: Very common houseplant.
This is called alocasia.
This one is called anthurium.
They're generally a more leafy plant.
Very common.
You know, there's also pothos.
There's figs.
They're determined by the spadix, right.
So this is the flower that comes out in the plant.
Kevin: Mm-hmm.
Jenn: But they require a little different mix.
They need more organic material.
Kevin: So when you say organic, this looks more like dirt.
I know you guys don't call it that, but that's the soil -- more traditional looking.
Jenn: Exactly.
Kevin: What's the other stuff?
Jenn: So the black stuff is charcoal.
Kevin: So, again, volume, but very light right there.
Jenn: Creates nice space, nice void.
And then perlite.
Kevin: This is more of the size that I'm used to seeing it in right there.
Jenn: So this is appropriate for this type of plant.
Another popular thing to add to the soil if, you know, you could create your own mix, or you could add these things called LECA balls.
Kevin: Oh, wow.
Also very light.
Jenn: Yep.
They're made of clay.
Kevin: It's like a malt ball for plants.
Jenn: But they add air into the soil.
This would make bigger voids, so you're not going to have a wet, wet environment.
Kevin: And then you've got different fertilizers for these.
Jenn: So water soluble -- this one you add to water.
So there's a mixture like 10 to 1.
You know, just read the package, look at the size of your plant, and then you get your recipe.
Kevin: And what are these?
Jenn: This is a slow-release fertilizer.
Check the package amount.
If you put a teaspoon on, you sprinkle it around the plants and over time it dissipates and breaks.
Kevin: Either or.
Jenn: Exactly.
Either or.
Kevin: All right.
So, succulent cacti.
I think of these often as kind of bulletproof because they don't die when I don't water them.
Jenn: Yes, these are good.
These are good plants for you.
So this is a prickly pear cactus.
This is called an echeveria.
It's a very popular succulent.
Think of where they grow -- in the desert, right?
They want to have well-drained soil, but they -- they like sandy soil.
See the difference?
Kevin: Oh, yeah.
Oh, yeah.
Very fine.
It's dark color, but it feels like sand.
Doesn't quite look like it, but feels like sand.
Jenn: And so it'll capture the water, but it'll also run right through so it's not in standing water.
And then this is perlite.
Kevin: Okay.
Jenn: And then we also have the coconut.
So it just adds different textures and the roots grab on around.
And so succulents, they store their water in their leaves so you don't have to water them as often as the others.
Kevin: And what are they doing here?
Is this a concentrate or is this direct add?
Jenn: This you mix -- again just like the aroids -- you mix this with water and then follow the content, the recipe on the package.
Kevin: Okay.
Jenn: And then, yeah.
Kevin: So a lot of beautiful choices.
And each one of these categories is probably got, you know, an infinite number of plants.
It starts with the soil.
Get that right.
Jenn: Exactly, if you start with the soil, you're on a good start.
Next step, you determine light.
Kevin: Okay.
Jenn: But that's a whole other thing.
Kevin: Well, bring me back.
Let's talk about that too.
Jenn: All right.
Sounds good.
Kevin: Thanks, Jenn.
♪♪ Mark: Hey, Joe.
Joe: Mark, thanks for coming.
Mark: All right.
Thanks for having me out.
So you wrote me about a breezeway, correct?
Joe: I did, it's right here.
Mark: All right.
Some mortar joints are loose?
Joe: Yeah, it needs a lot of work, I think.
Mark: Okay.
Joe: All right, Mark, so here it is.
Mark: Here's the patient.
Okay.
Joe: Yeah.
So as you can see, we've lost a lot of mortar.
You know it's very soft, and then there's holes.
These -- we had screens on at one point.
And so you can see water got in and eroded it.
Mark: Right.
Joe: It's so soft that, um, I swept up a bunch of stuff over time, and, um... Mark: Wow, Joe.
Joe: ...you can see that it's just a clump of sand.
Mark: Yeah, so in my experience, this happens when you don't properly wet the surrounding brick before applying the mortar.
If you skip that step, the moisture gets sucked out of the mortar as it dries and you're left with what we call dusty mortar.
I do see all the problems, and the good news is, Joe, that we can fix them all.
We're going to use a method that we call spot painting.
I think the floor is in really good shape, in a general sense.
You can see the depth in this course right here is really low.
We're going to fix that.
You can see the discoloration in the patchwork that someone also tried to do.
We're going to be able to match the joints perfectly and everything is going to look seamless.
Joe: Oh, I can't wait.
Mark: All right, why don't we get going?
Joe: All right.
Mark: All right, let's go.
All right, Joe, so the first thing we're going to want to do is remove the unmatched material.
We're going to want to deepen these joints right here.
You can see this area that we have right here, this is what we're going to try to mimic.
I always tell people, "When in Rome be a Roman," right?
So you can see the finish on this joint -- we're going to mimic that, but more importantly, we're going to mimic the depth.
So you can see how this mortar comes right up on the edge of these bricks.
That's what we're going to want to do in this area as well.
So we're going to get started with a hammer and a chisel.
If we do need a grinder, we have one in the truck, we'll use that.
But again, as you pointed out, these joints are soft enough where I think we're going to be able to use a hammer and a chisel.
Joe: Okay.
Mark: Let's start chipping out this old mortar.
Joe, as we're doing this, one of the most important things is we want you to stay off the edge of that brick with your chisel.
Just like this -- You sneak it in, hammer.
You can see that the mortar is really soft.
Joe: So, Mark, I just have a question.
Mark: Sure.
Joe: How far should I go?
I don't want to go too far.
Mark: So you don't want to go too deep, but you want to go at least three quarters of an inch.
That's standard for repointing.
If you can get down an inch, I like it more because the mortar just becomes stronger that we put in.
So... Another thing I want to point out, Joe, is you're in that perfect spot right there.
We could spot point that, but it is a little bit too big for a spot point.
So what I do in that instance is I go at least the width of the brick -- so I go from here to here -- and then when we put the patch in, it's going to be less noticeable.
Joe: Perfect.
Mark: And I'm going to do that as well.
Okay.
Let's clean up the dust with that vac.
And then we'll use a wet brush.
Joe: Okay.
No one can vacuum like me, man.
Mark: No one.
No one.
Joe.
You're the best I've seen.
You can push it with the broom, once I have enough.
Now, what we're doing now, Joe, is we're cleaning the dust off of these masonry joints and brick.
Very important for bonding.
But the other thing, this is a step that they skipped the first time around.
So if we don't dampen the brick, it's going to suck the water out of the mortar.
And that's what made it so brittle to begin with.
Joe: It is really sucking it up.
Mark: It's really sucking it up.
So you can see what I'm talking about.
Joe: Yeah.
Mark: Well, this was -- We call this thirsty mortar, Joe.
Joe: Indeed.
Mark: It is thirsty.
All right, so, Joe, before we apply the mortar into the back, into the joints, I want to just show you what we have.
Okay, uh, this is Portland cement.
All Portland cement mixed with sand will make a type S or a type N, which is what we have in front of us.
The lighter color is type N, the darker color is type S. Type S -- think strength.
So elevator shafts, stair shafts, retaining wall, foundation.
Type N is what we strictly use for brick work.
It gives a little bit of movability to the brick because everything's a natural material, don't forget.
Joe: Sounds good to me.
Looks like it's going to be a good match.
Mark: Yeah, yeah, and you'll see, once we get it wet, we'll do a little comparison and we'll make sure.
But I think that's the one we should use.
Joe: That's great.
Let's get going.
Mark: So, Joe, we have our type N mortar mixed and ready to go.
I do want to add one more element.
This is called bonding agent.
And I just spread it out like this in the tub.
This is one bag of type N, and we just use eight ounces of bonding agent.
So if you want to grab your trowel right there, Joe, all we need you to do is just spin it into the mix.
That's it.
And you know you're done when you don't see it anymore.
Joe: Why are we putting the bonding agent in?
Mark: I like to use it, especially on repair jobs, it helps bond to the existing mortar, and it also helps bond to the brick, hence the name "bonding agent."
And it seems to be mixed in, Joe.
Watch what I do in this tub, Joe, you see how I'm spreading this out?
That's because I'm going to make a grab.
This is the first joint that I'm going to go for, so I'm going to estimate what I'm going to take out of the tub and put it on my trowel.
Just like that.
But I want to get deep and shake it.
The most important thing right now, Joe, is to make sure when you fill these joints, we're going as neat as possible.
Joe: Yeah, and if anything is to get on a brick, uh, like when I do it, um, you just want to what?
Get it off with a rag or something?
Mark: Nope, we're going to let it sit because we're going to come back with a sponge when we're all done, and we're going to clean it up.
We're going to want to come back with our flat joiner.
That's what this is.
And they're made to really, really press the new mortar into existing.
And you can see me wiggle it just a little bit, Joe.
I like to do that to make sure I'm making a connection with the old and new mortar.
And you can see that between these brick, it became a little tight.
Joe: Yep.
Mark: So that's when I'm going to rotate my flat joiner.
And I'm going to make sure... I push the new mortar right down into the existing.
Okay, Joe, so now we're taking the heavy stuff off.
Let's get all this... into a pile now.
Joe, one of the things that's going to help us mimic existing is me taking a little bit off the edge of each brick to expose it, because that's what we have as existing.
And you're going to see in one minute when we start the sponging... ...you're going to see what it does.
Joe: It's like being a sculptor.
Mark: It kind of is, you know.
So okay, Joe, we're getting to the part where we're going to use the sponge.
And what that does for us is strictly aesthetics.
And it pulls the aggregate out of the water and exposes it.
And again, that's what we have for existing.
We take the cream off the top of the joint.
Joe: I see.
Mark: And that leaves us the sand.
Joe: This is fantastic.
Looks great.
Mark: So I think we did enough here.
Joe: Yeah, I thought we were done, but I see you still have some stuff in your hand.
Mark: So I'm going to leave you with a little bit of homework.
With the two open ends, when you have the screens on, weather can come inside.
This sealer is going to help you waterproof these two areas.
But I think most importantly is the fact that some of the sand still comes up.
So once we apply the sealer, all that goes away.
So if we get down in this area right here, Joe, which is dry -- the reason we can't do the rest of the floor today is because it's wet.
But I'm going to show you in this little area we're going to use this water-based sealer.
Very simply unscrew the cap.
Pour it into a regular... paint dish.
That's plenty.
Regular paintbrush.
I like to saturate that brush, Joe.
And then I always do my joints first because you'll see that that mortar, which again, is dry, really, really sucks up the product.
But this is how simple it is, Joe.
Joe: I can handle simple.
Mark: Yeah.
Joe: You know, it's got a little blue tint to it.
I mean, as it goes on.
Mark: Yes.
Right.
And it's completely transparent, 100% invisible.
So as it dries, all of that goes away.
And as I said, I'm going to let this sit just a tad.
And because this is a floor, Joe, I'm going to ask you to do two coats right off the bat.
Joe: And, um, do you -- do you let it dry to a certain extent between or you just go right at it?
Mark: Yeah.
I would probably wait 24 hours before the second coat.
I have a lot of confidence in you, Joe.
So I'm going to hand it right off to you.
Joe: Whew!
That's more than I thought.
Mark: Let you finish up.
Yeah, yeah, but I think you're ready.
So, uh, remember, have a good time with it, and it's going to come out great.
Joe: I can't thank you enough.
Mark: My pleasure to be here, man.
Thank you.
Joe: Such a great job.
Mark: Okay, Joe.
Joe: Thank you.
Mark: And if you have questions about your house, we'd love to hear from you.
So keep them coming.
Until then, I'm Mark McCullough for "Ask This Old House."
Kevin: Next time on "Ask This Old House," we learn about the dangers of decibels and the importance of hearing protection when working with tools.
Man: We got some peaks up above 120dB.
Kevin: Then it's a team effort when Richard, Heath, and Nathan help a couple relocate their laundry from the basement to the first floor.
Richard: So we'll be able to dock right onto that and push to you.
Okay, there we go.
Kevin: All that on "Ask This Old House."


- Home and How To

Hit the road in a classic car for a tour through Great Britain with two antiques experts.


Support for PBS provided by:
Funding for Ask THIS OLD HOUSE is provided by The Home Depot and Renewal By Andersen.